
Web Manual
Bridge Meter
Manual
Bridge Meter is a macOS meter designed to stay small on your workspace. Switch between Mac system audio, audio input, and Bridge Plugin signals to check VU, loudness, phase, and spectrum displays.
Input
Choose Input
Choose the input from Bridge Meter's menu. To quickly meter the sound coming out of your Mac, choose “System Audio Out”. With Bridge Plugin, Bridge Meter can receive directly from your DAW, so audio from other apps will not be mixed in.
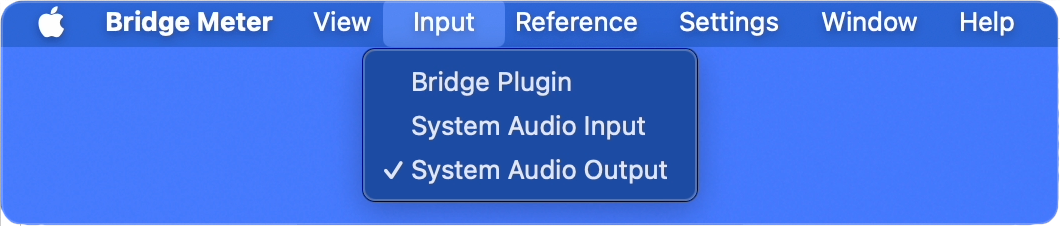
Using System Audio Out requires macOS System Audio Recording permission.
Bridge Meter uses audio only for metering. It never records, stores, or transmits audio externally.
Meter Display
Switch the display from the meter area
| Scroll wheel | Switch between VU, Loudness, and Analyzer |
|---|---|
| Double-click | Switch to Loudness |
| ⌘ + Double-click | Switch to Analyzer |
| When Loudness or Analyzer is displayed, double-click |
Return to VU |
Reference
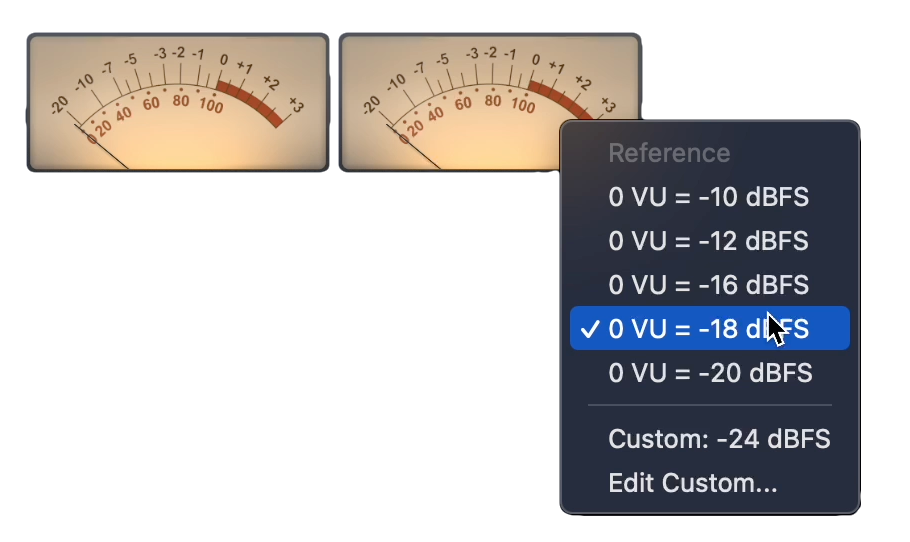
Set the Reference Level
| Right-click / Control-click | Choose the reference level |
|---|---|
| Edit Custom... | Edit the custom value in 0.1 dB steps |
Panels
Detach Panels
| Shift + Double-click | Detach the current Loudness or Analyzer display |
|---|---|
| Shift + Double-click on a detached panel |
Return it to the Bridge Meter main window |
| ⌘ + Shift + Double-click | Detach Loudness and Analyzer together |
| ⌘ + Shift + Double-click on a detached panel |
Return all detached panels to the Bridge Meter main window |
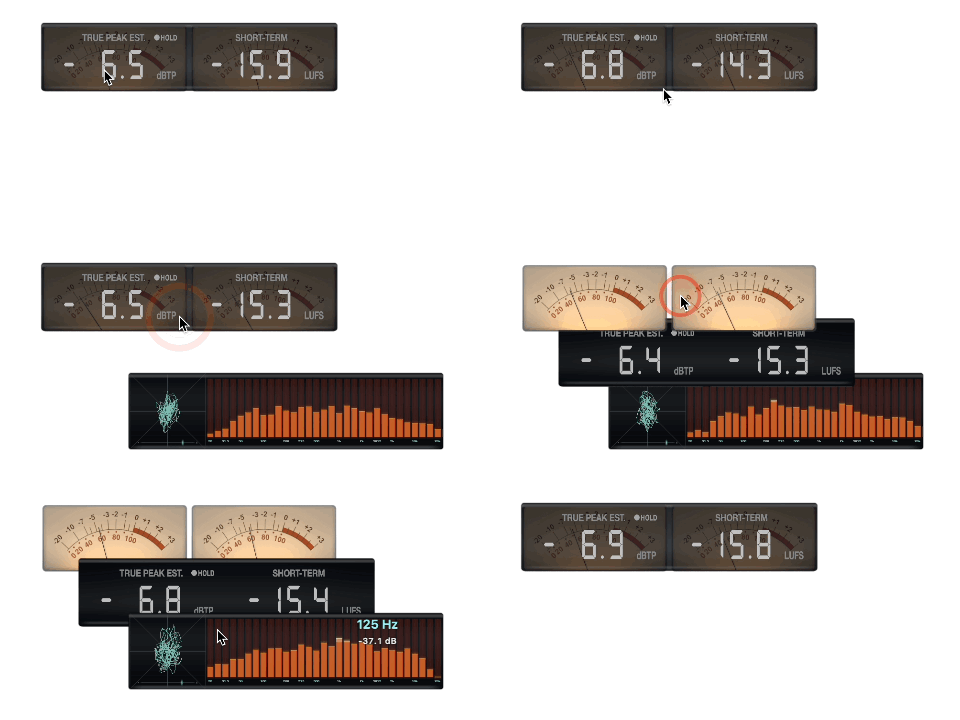
When returning all panels at once, the window you ⌘ + Shift + double-clicked will be shown after the panels are combined.
Bridge Plugin
Receive from Bridge Plugin
Insert the AAX / VST3 / AU compatible Bridge Plugin in your DAW, and Bridge Meter can receive the display signal directly from the DAW. The plugin sends only the signal used for metering and does not change the audio itself.
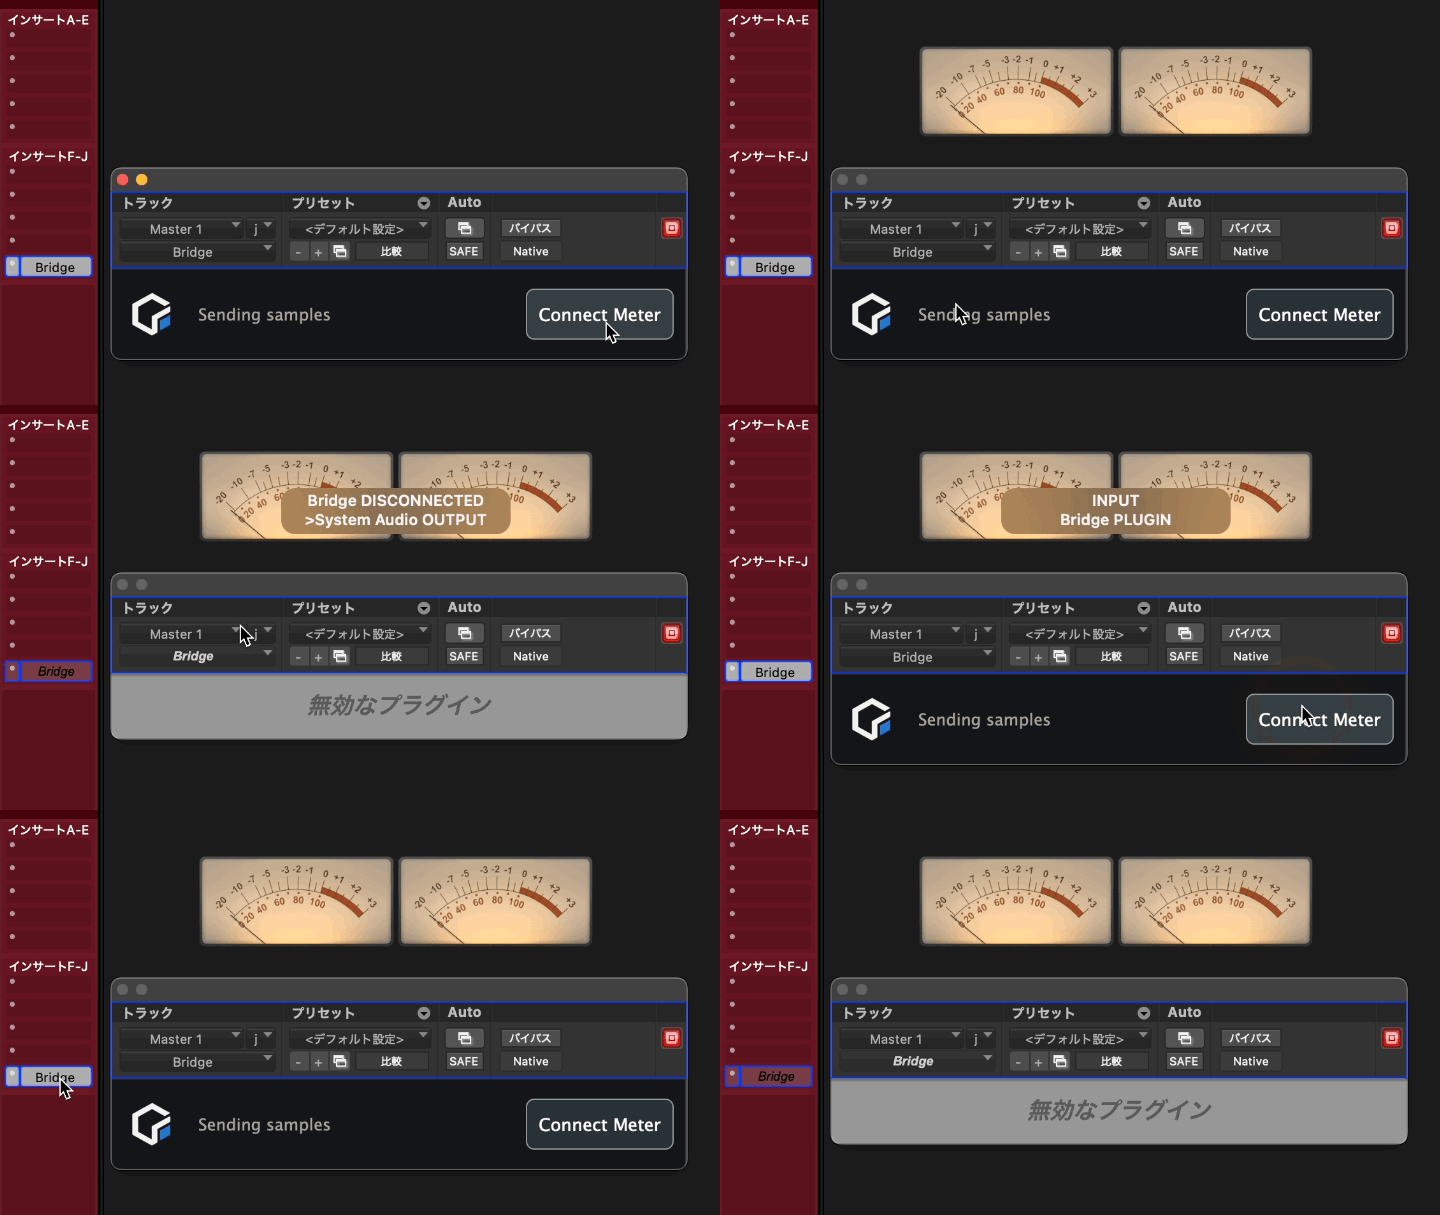
| Click the Connect Meter button | Launch Bridge Meter and switch its input to Bridge Plugin |
|---|
If Bridge Meter is already running, clicking the button will still switch the input to Bridge Plugin.
When the plugin disappears, if the previous input was System Audio Out / Input, Bridge Meter returns to that input.
Bridge Plugin indicator light
The indicator light at the bottom-right of the VU meter shows the Bridge Plugin status. When it is lit, Bridge Meter is displaying audio received from Bridge Plugin.
- Lit: Receiving audio from Bridge Plugin
- Unlit: Waiting for Bridge Plugin audio, or temporarily using System Audio Input / Output
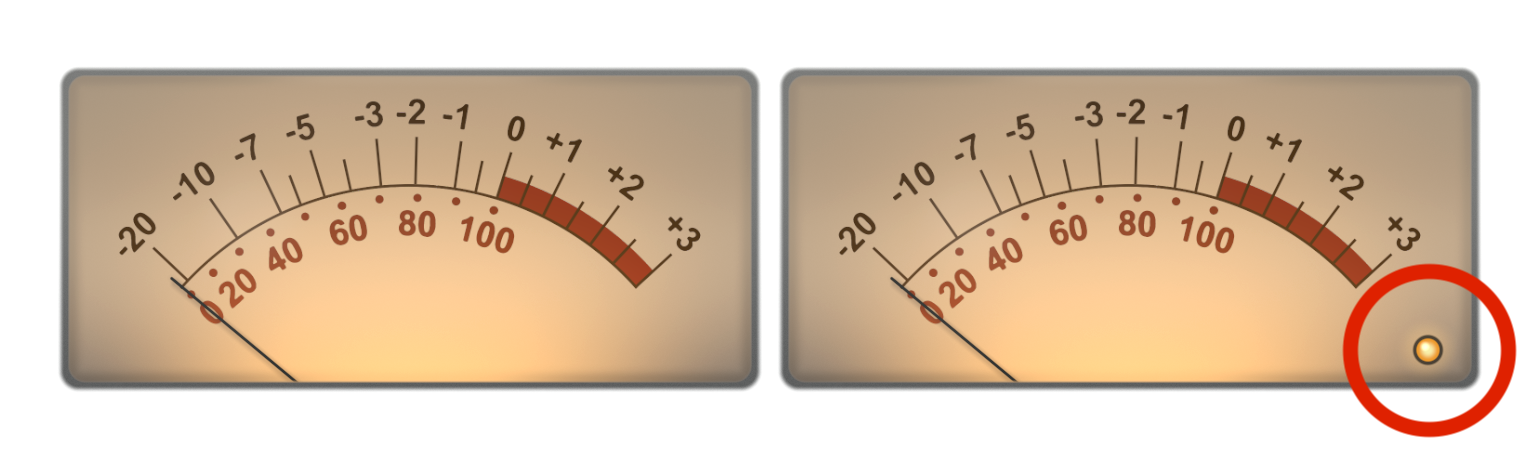
When Bridge Plugin is selected as the input, the indicator is always visible.
When System Audio Input / Output is normally selected, the indicator appears only while connected to Bridge Plugin. Use Shift + the scroll wheel to temporarily switch between Bridge Plugin and the normal input.
If Bridge Plugin is running, Shift + scroll up switches to Bridge Plugin even if Connect has not been pressed in the plugin. Nothing changes if Bridge Plugin cannot be found.
Detailed Manual
Layout Sets
From the Window menu, you can save the current panel positions and sizes as a layout. Saved layouts can be restored from the menu or with shortcuts.
| Save Layout | Save the current panel positions and sizes to the selected number |
|---|---|
| Layout 1-5 | Restore a saved layout |
| ⌘ + 1-5 | Restore a saved layout with a shortcut |
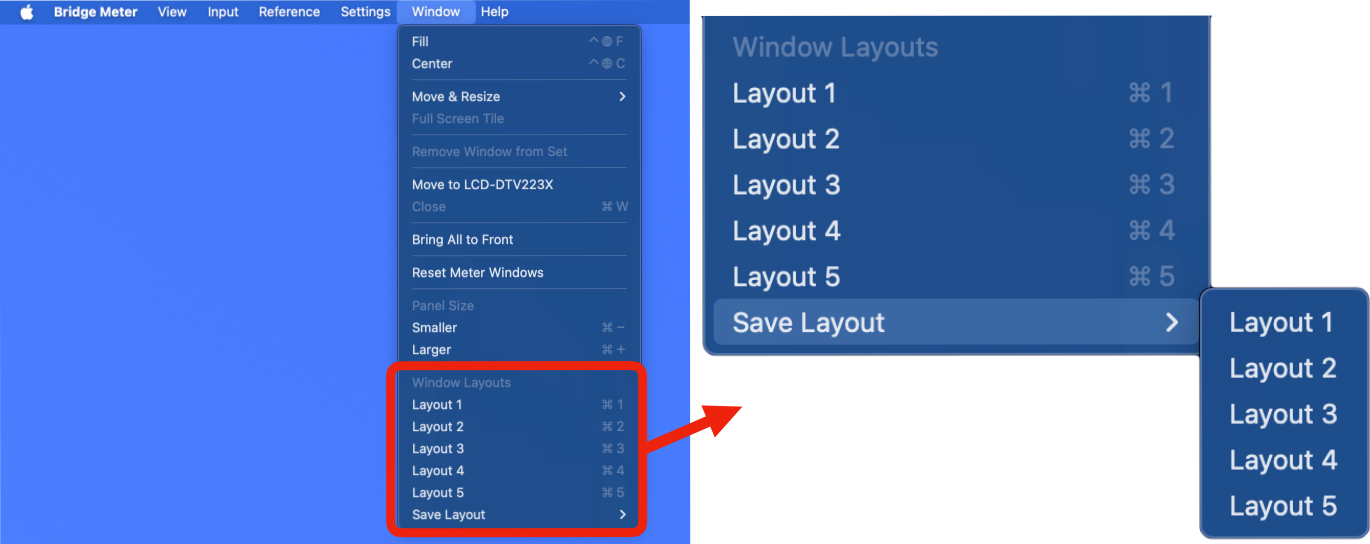
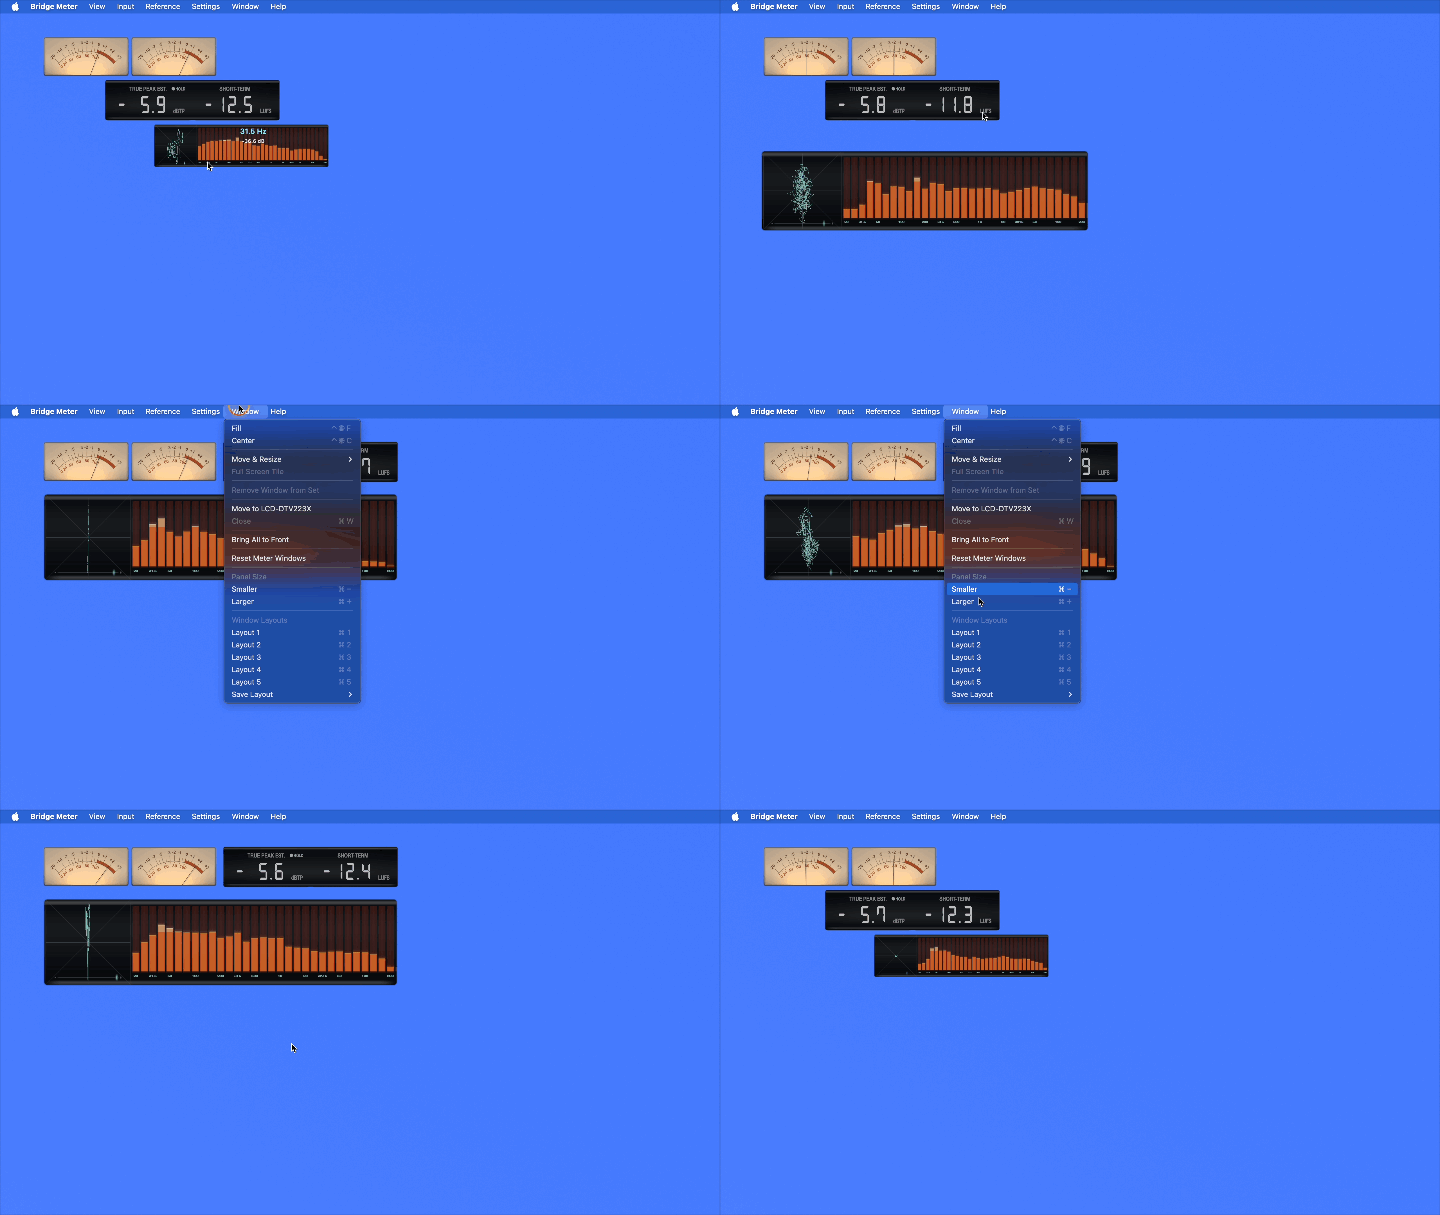
Layout sets save each panel's position and size. They do not save the display mode or whether panels are detached.
Detailed Manual
VU Settings
Choose the needle motion from Settings > Needle. In addition to Preset A / B, you can save and use your own custom presets.
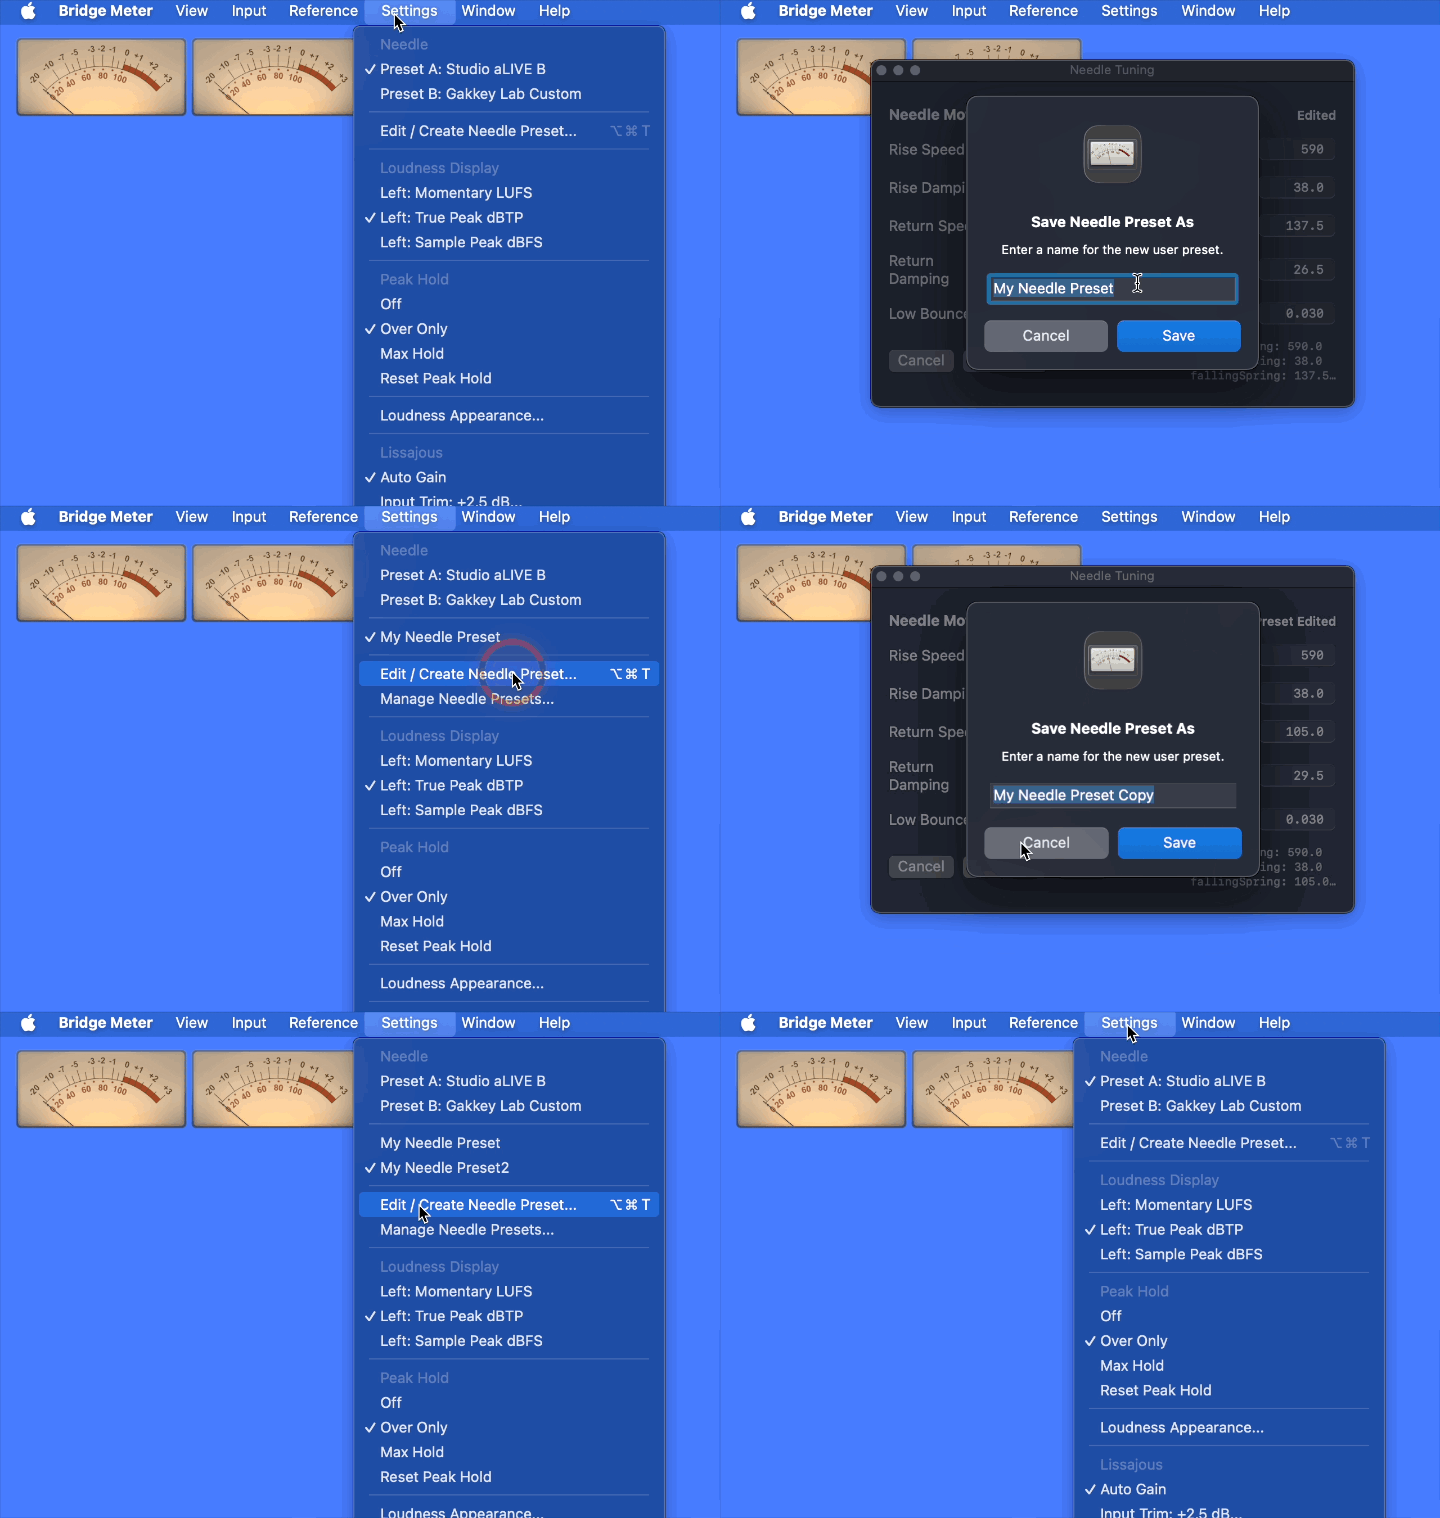
| Preset A / B | Choose a needle motion preset |
|---|---|
| Edit / Create Needle Preset... | Start editing from the currently selected preset |
| Save As... | Name and save the customized settings |
| Manage Needle Presets... | Rename or delete custom presets. |
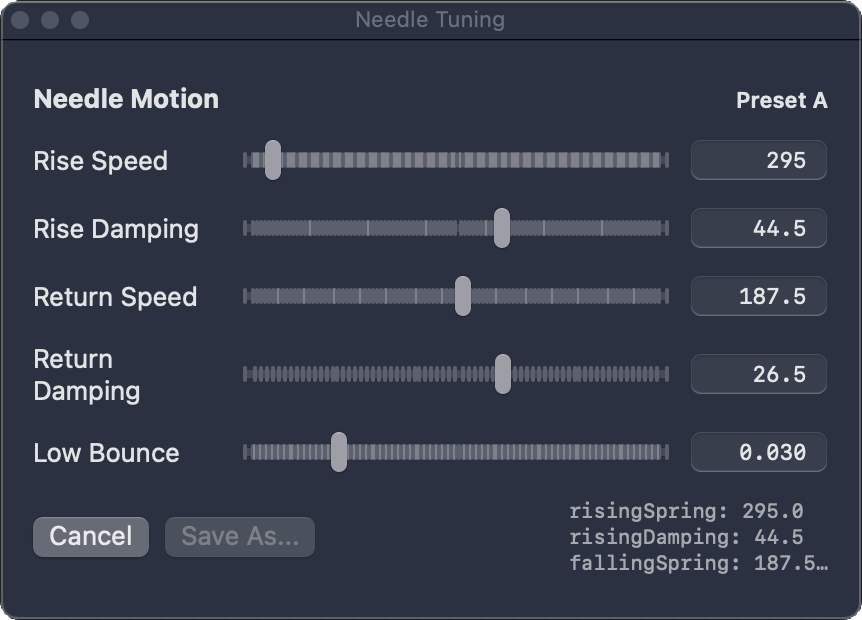
| Rise Speed | Higher values make the needle react faster upward. |
|---|---|
| Rise Damping | Higher values dampen upward movement and reduce overshoot or bounce. |
| Return Speed | Higher values make the needle return downward faster. |
| Return Damping | Higher values dampen downward movement and reduce undershoot or bounce. |
| Low Bounce | Controls the small bounce when the needle returns near 0 VU. Higher values make it easier for the needle to pass slightly beyond 0 as it settles back. |
Detailed Manual
Loudness Settings
Right-click or Control-click the loudness panel to open the loudness display settings menu.
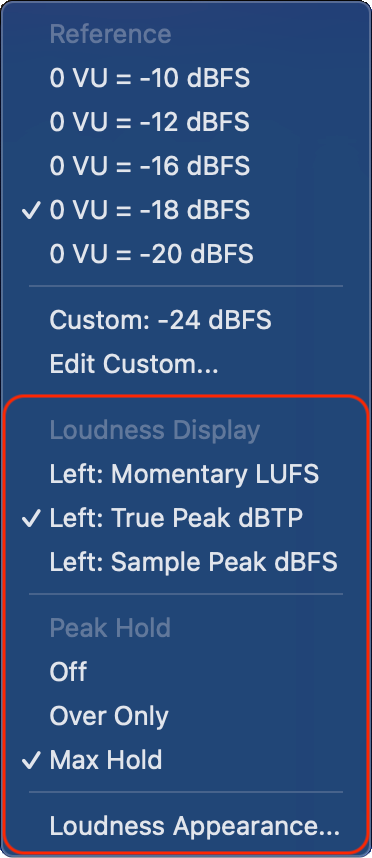
Loudness Display
Choose what appears on the left side of the loudness display.
| Left: Momentary LUFS | Shows Momentary Loudness, useful for checking loudness over a short time window. |
|---|---|
| Left: True Peak dBTP | Shows the estimated True Peak. Use it as a guide for peaks that account for inter-sample peaks. |
| Left: Sample Peak dBFS | Shows Sample Peak, the peak level based on actual sample values. |
Peak Hold
Choose how peak values are held.
| Off | Do not use peak hold. |
|---|---|
| Over Only | Hold peaks only when they go over 0. |
| Max Hold | Hold the maximum peak value detected. |
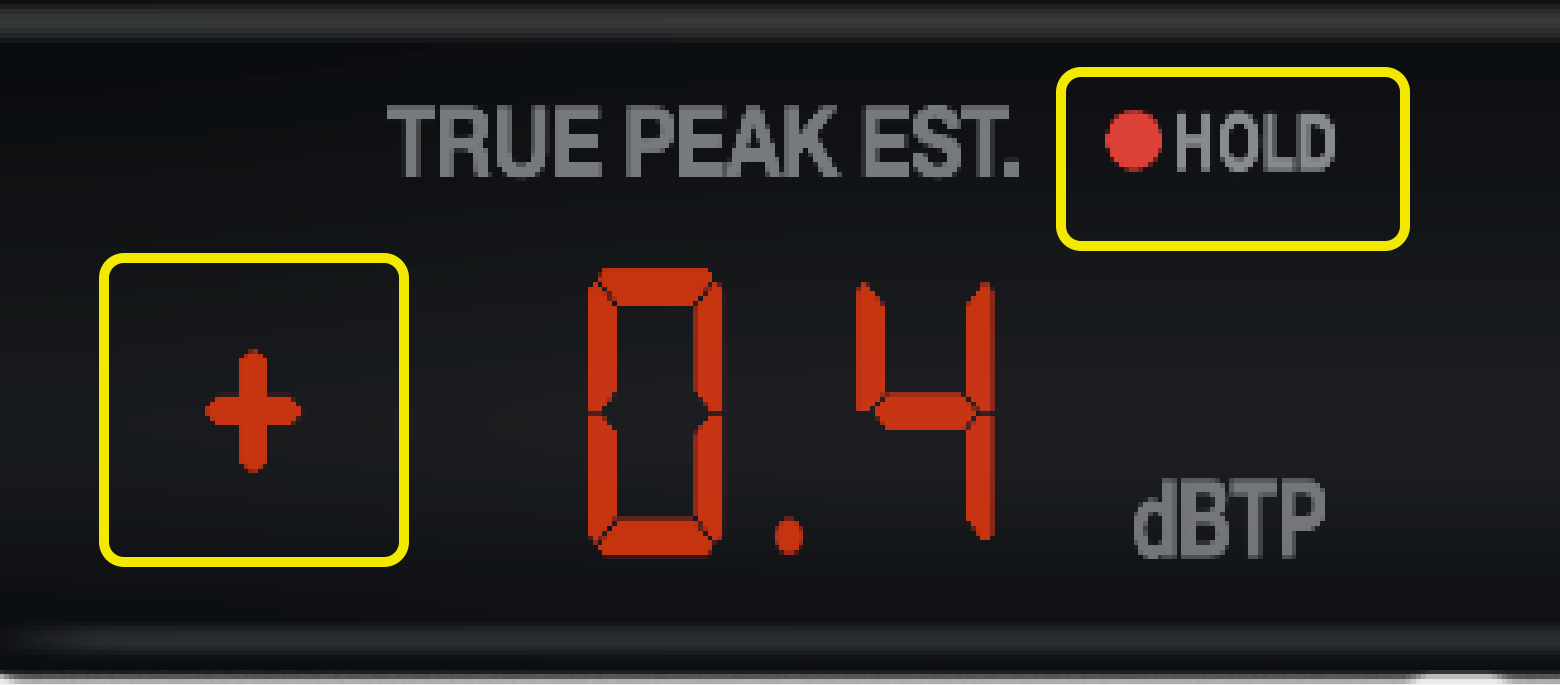
Reset Peak Hold
Click near the hold lamp or near the +/- display to reset peak hold.
Hover near the hold lamp for about one second to reset it without clicking.
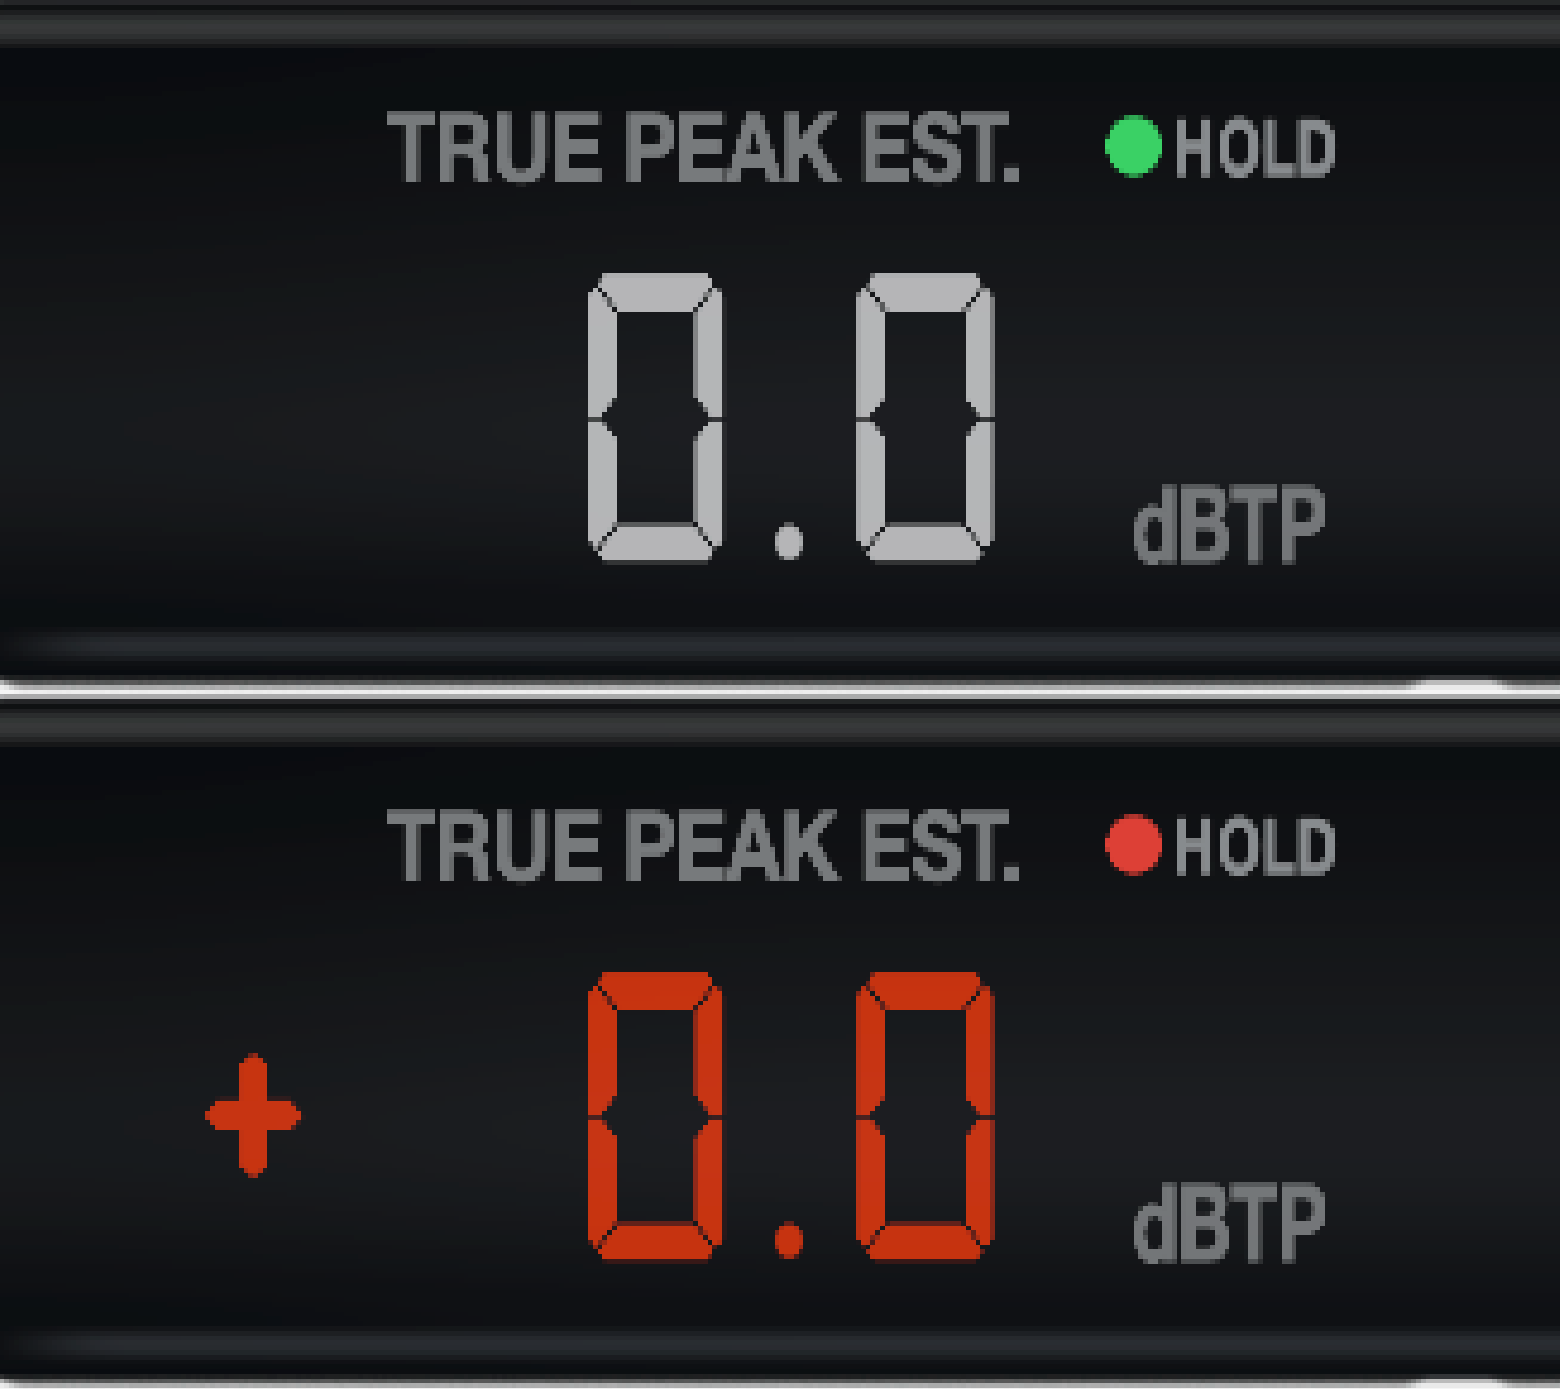
0.0 / +0.0 display
Although both values may appear as 0.0, a value that has not exceeded 0 dB internally is shown with a green lamp, while a value that has just exceeded 0 dB is shown as +0.0 with a red lamp.
Loudness Appearance
Adjust the appearance and color display of the loudness panel.
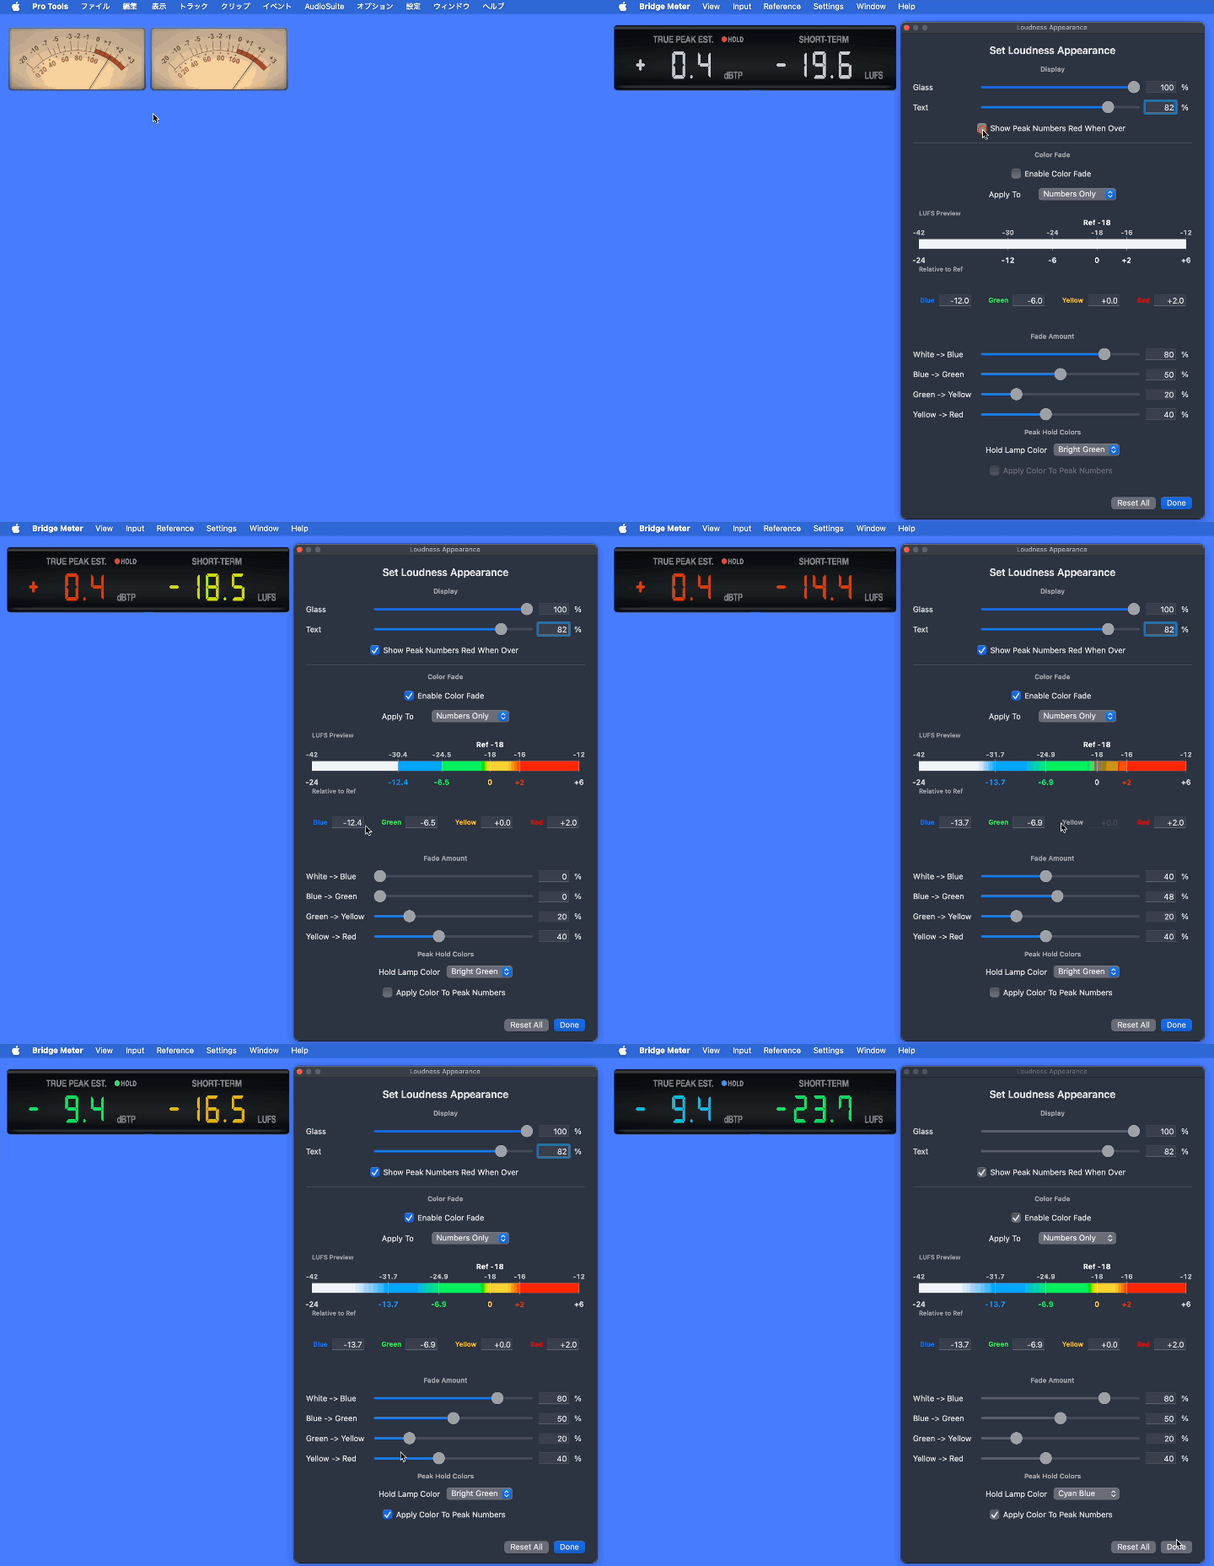
Display
| Glass | Adjusts the density of the glass display over the meter. Higher values make it darker and more opaque; lower values make it closer to transparent. |
|---|---|
| Text | Adjusts the brightness of loudness numbers. Higher values make the text brighter. |
| Show Peak Numbers Red When Over | When the peak value goes over the threshold, the peak number is shown in red as well as the peak lamp. |
Color Fade
| Enable Color Fade | Enables color display based on the loudness value. |
|---|---|
| Apply To | Choose where the color display is applied. The default, Numbers Only, applies it only to the numbers. |
| LUFS Preview | Preview how loudness values will change color with the current settings. The upper row shows LUFS values, and the lower row shows values relative to Ref. |
| Blue / Green / Yellow / Red | Set the threshold for each color. Values are relative to Ref. Click a color label to enable or disable that color. |
Fade Amount
| White -> Blue Blue -> Green Green -> Yellow Yellow -> Red |
Adjust how smoothly the display changes between colors. Higher values make the transition to the next color slower and smoother. Lower values make the color changes more distinct. |
|---|
Peak Hold Colors
| Hold Lamp Color | Choose the lamp color used during peak hold. |
|---|---|
| Apply Color To Peak Numbers | Apply the same color as the hold lamp to the peak numbers. |
| Reset All | Reset the loudness appearance settings to their defaults. |
Detailed Manual
Analyzer Settings
The Analyzer display is scaled for readability based on the current Reference Level.
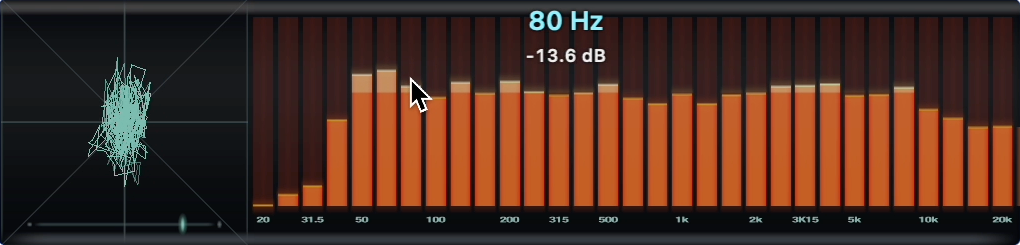
The left side shows the Lissajous display, the bottom shows the phase meter, and the right side shows the spectrum analyzer.
Move the mouse over the spectrum analyzer to check the frequency at that position and the dB scale corresponding to the cursor height.
Lissajous Settings
Right-click or Control-click the analyzer panel to open the analyzer display settings menu. The Lissajous display includes additional Auto Gain and Input Trim settings.
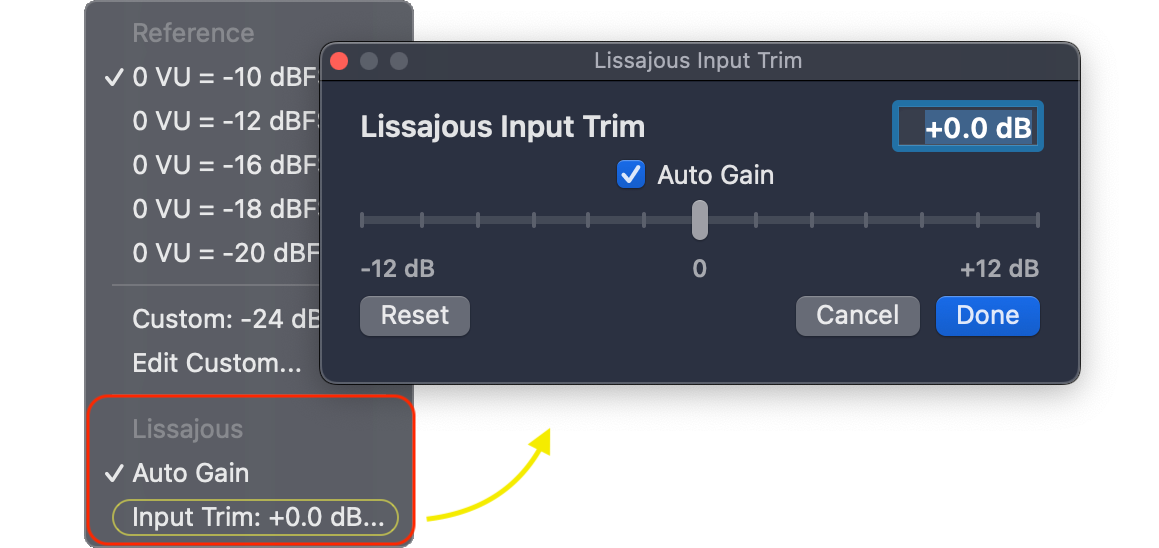
| Auto Gain | Automatically adjusts the gain of the Lissajous display according to the input level. Small signals are lifted for visibility, while large signals are kept from becoming too large on screen. |
|---|---|
| Input Trim | Manually adjusts the signal level going into the Lissajous display. Even when Auto Gain is enabled, you can fine-tune the final display size to your preference. |
The Lissajous input level is adjusted in this order: automatic scale based on Reference Level → Auto Gain → Input Trim.
Updates
Updates and Release History
Choose “Check for Updates…” from the Bridge Meter or Help menu to see whether a newer version is available.
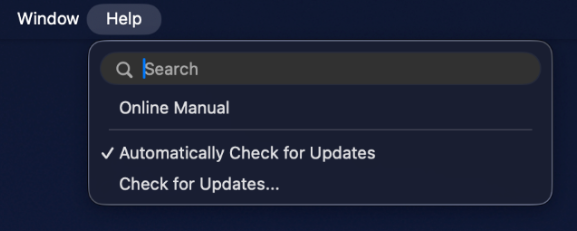
When “Automatically Check for Updates” is enabled, Bridge Meter notifies you when an update is available.
View Bridge Meter Release History